
Re-Upholstering a Chair
Upholstering a large chair or sofa is a complex job, however, smaller chairs and footstools can be recovered with relative ease and a little know how and patience.
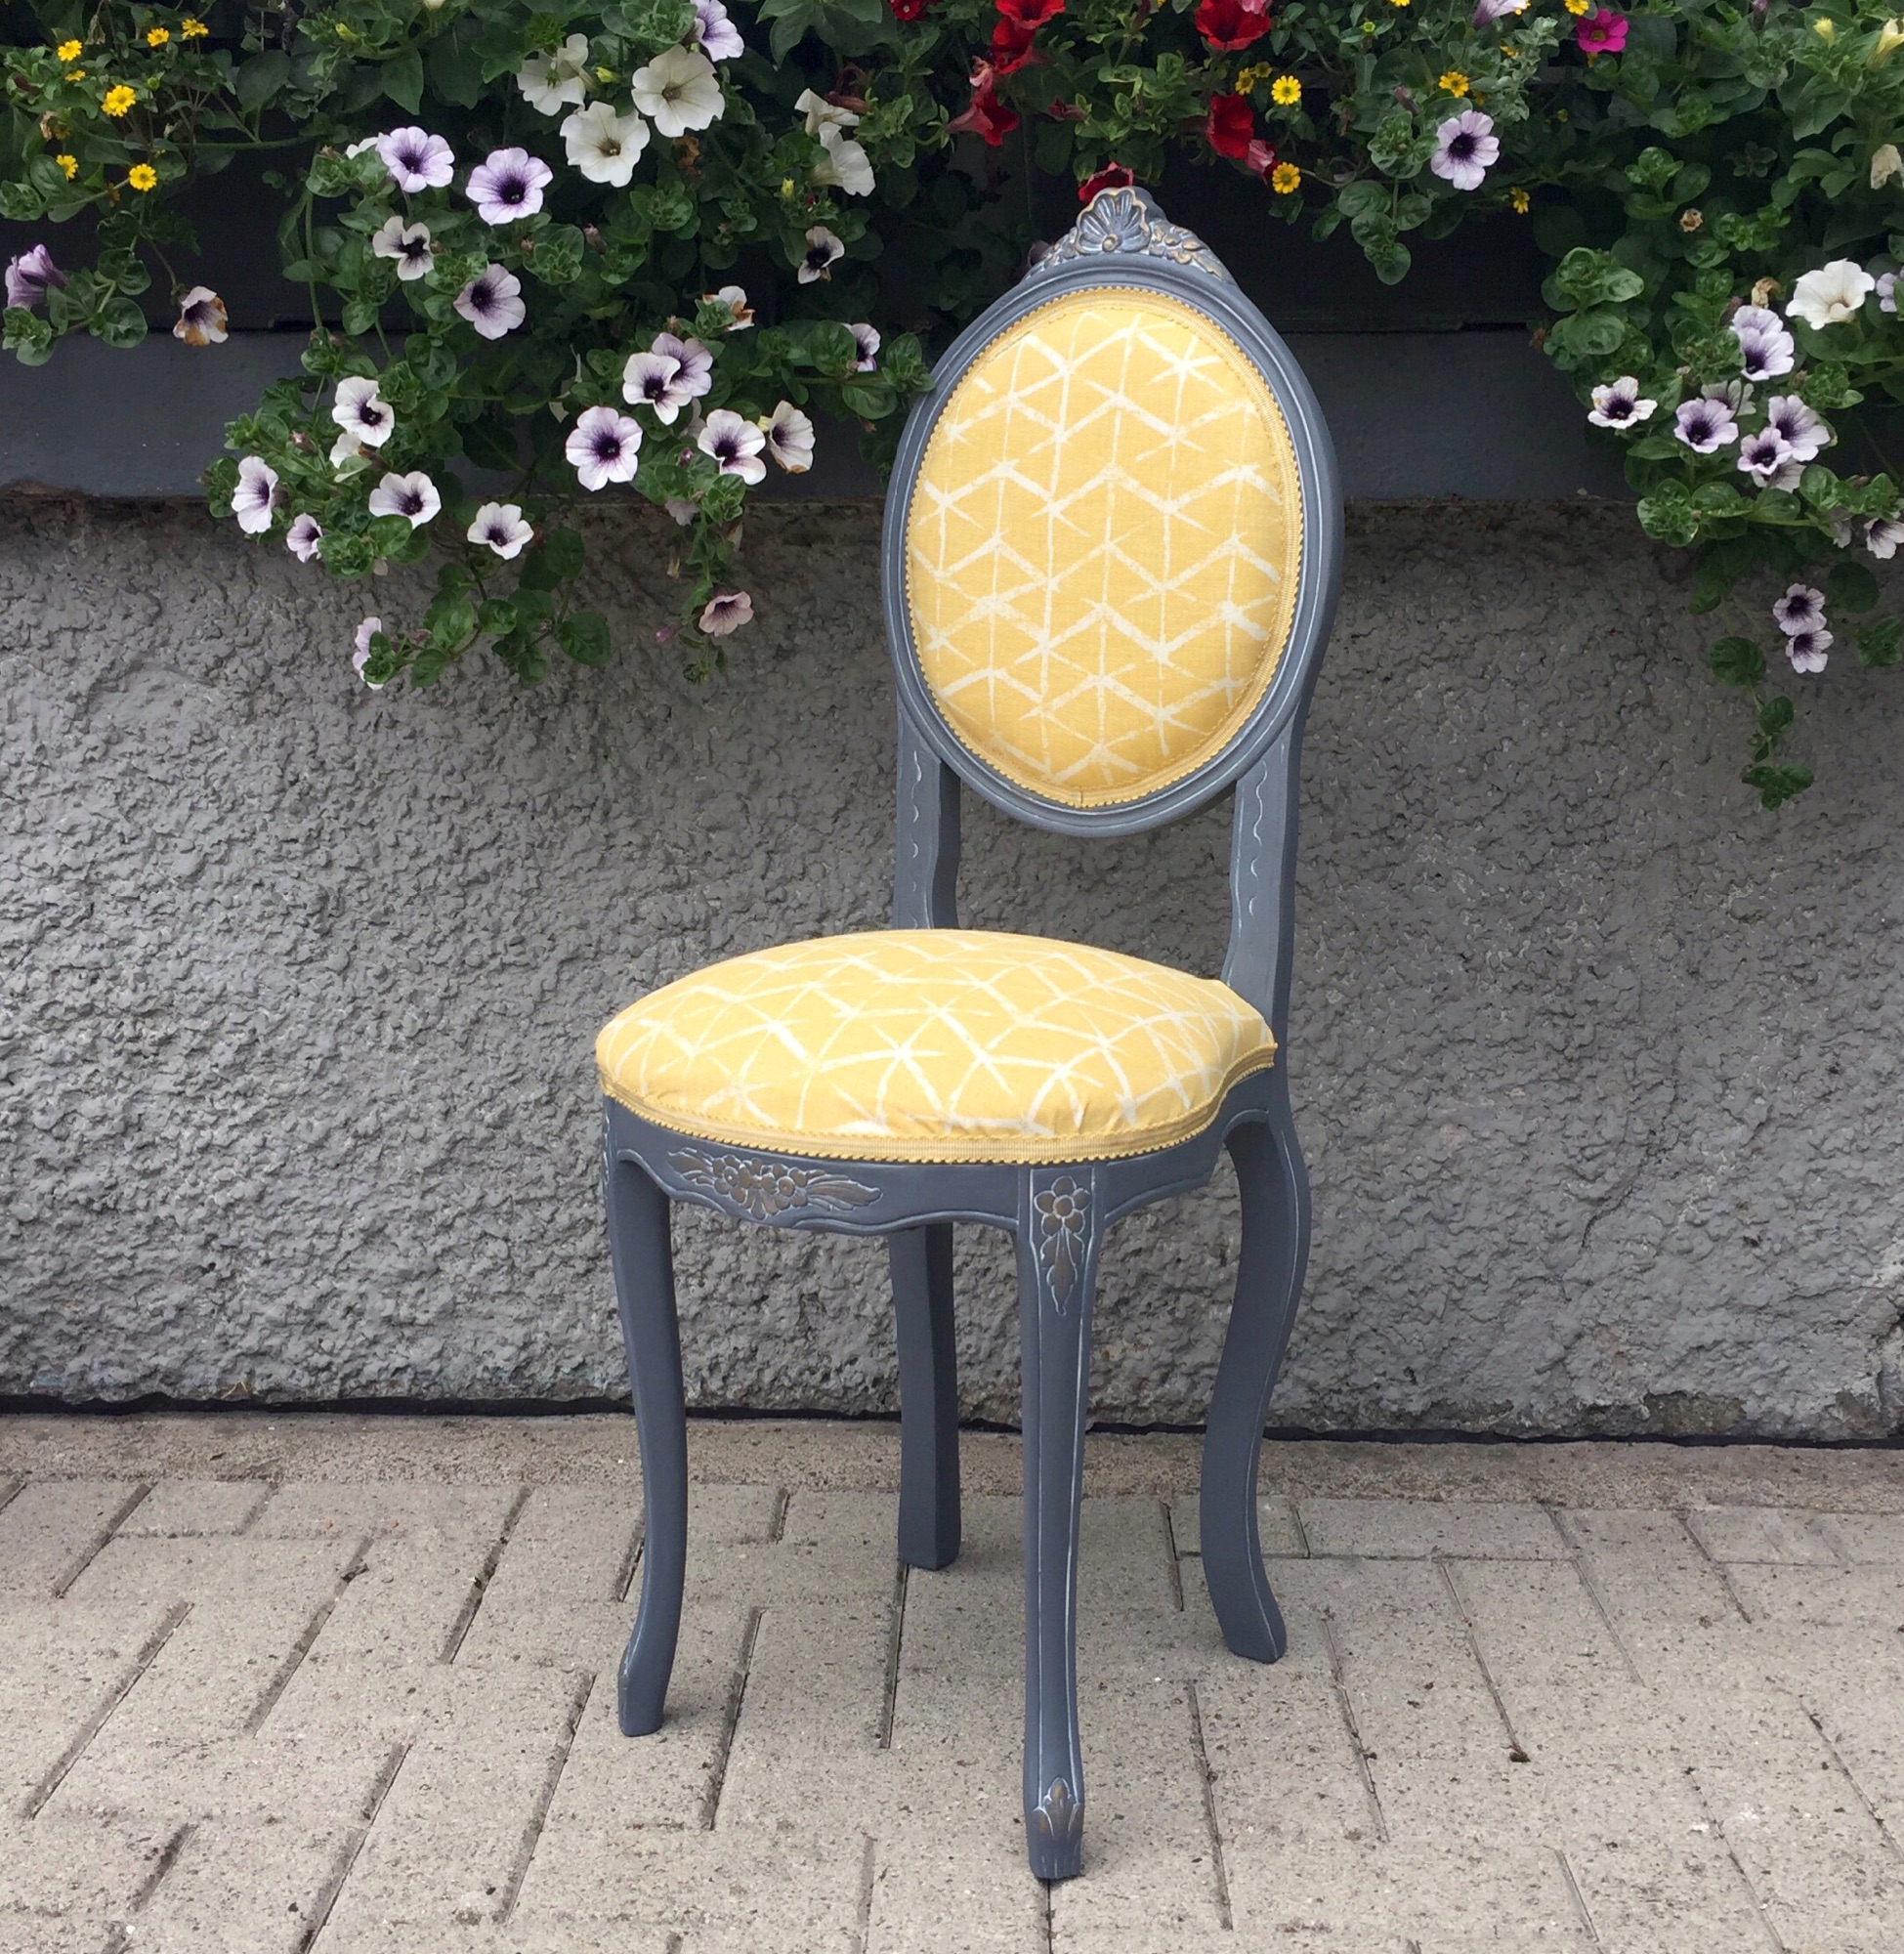
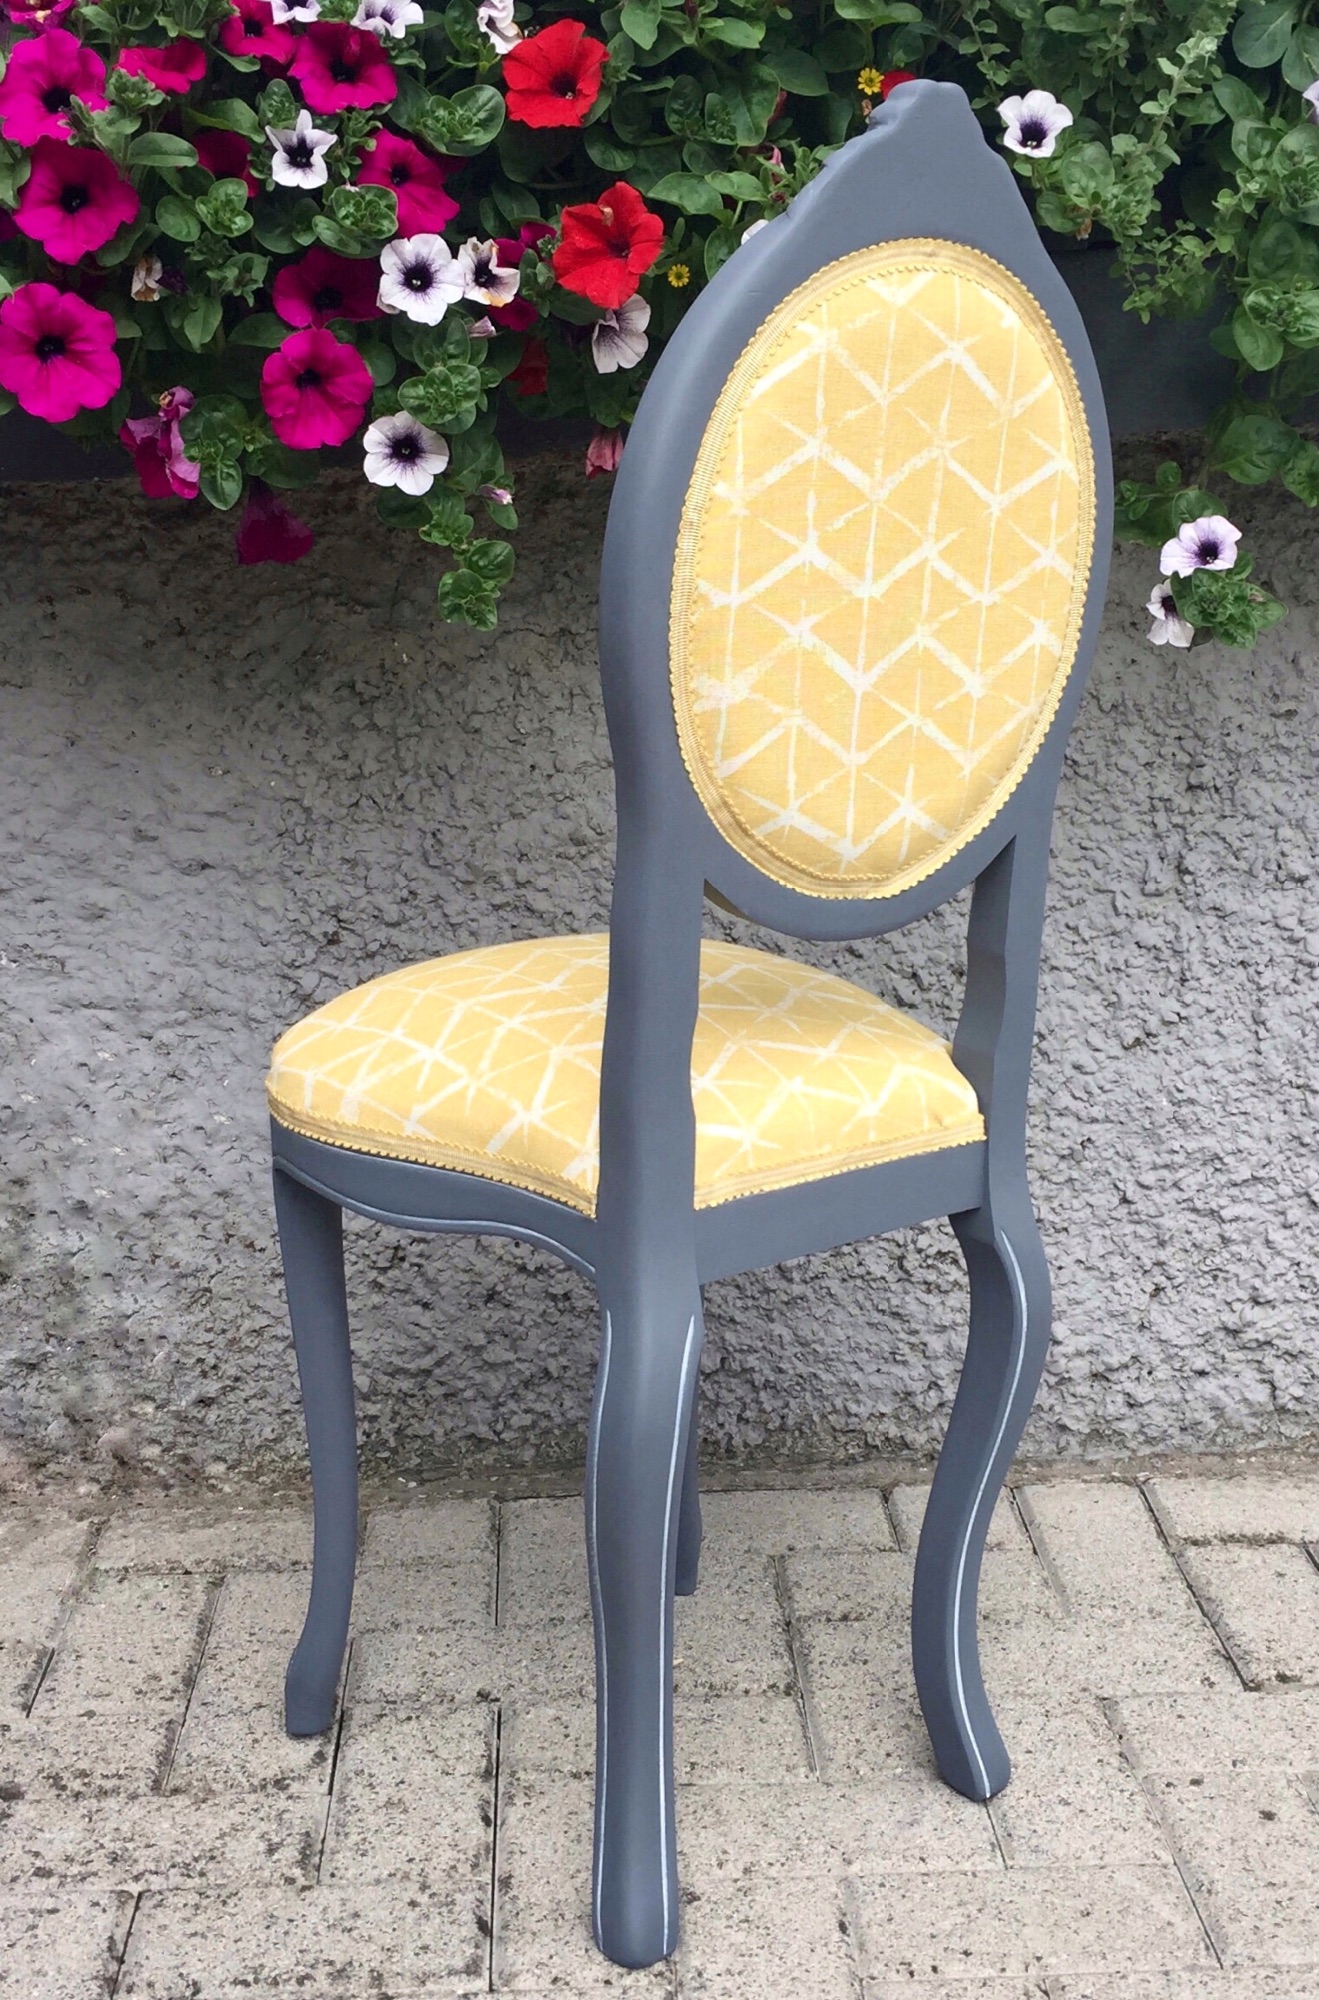
My client has this cute little chair, but wanted to have it modernised and freshened up to fit in with her home decor. She is not sure whether to display it in a spare bedroom or her hallway, so based on her colour scheme we went with colours that will suit both locations and she can change it around as and when she pleases.
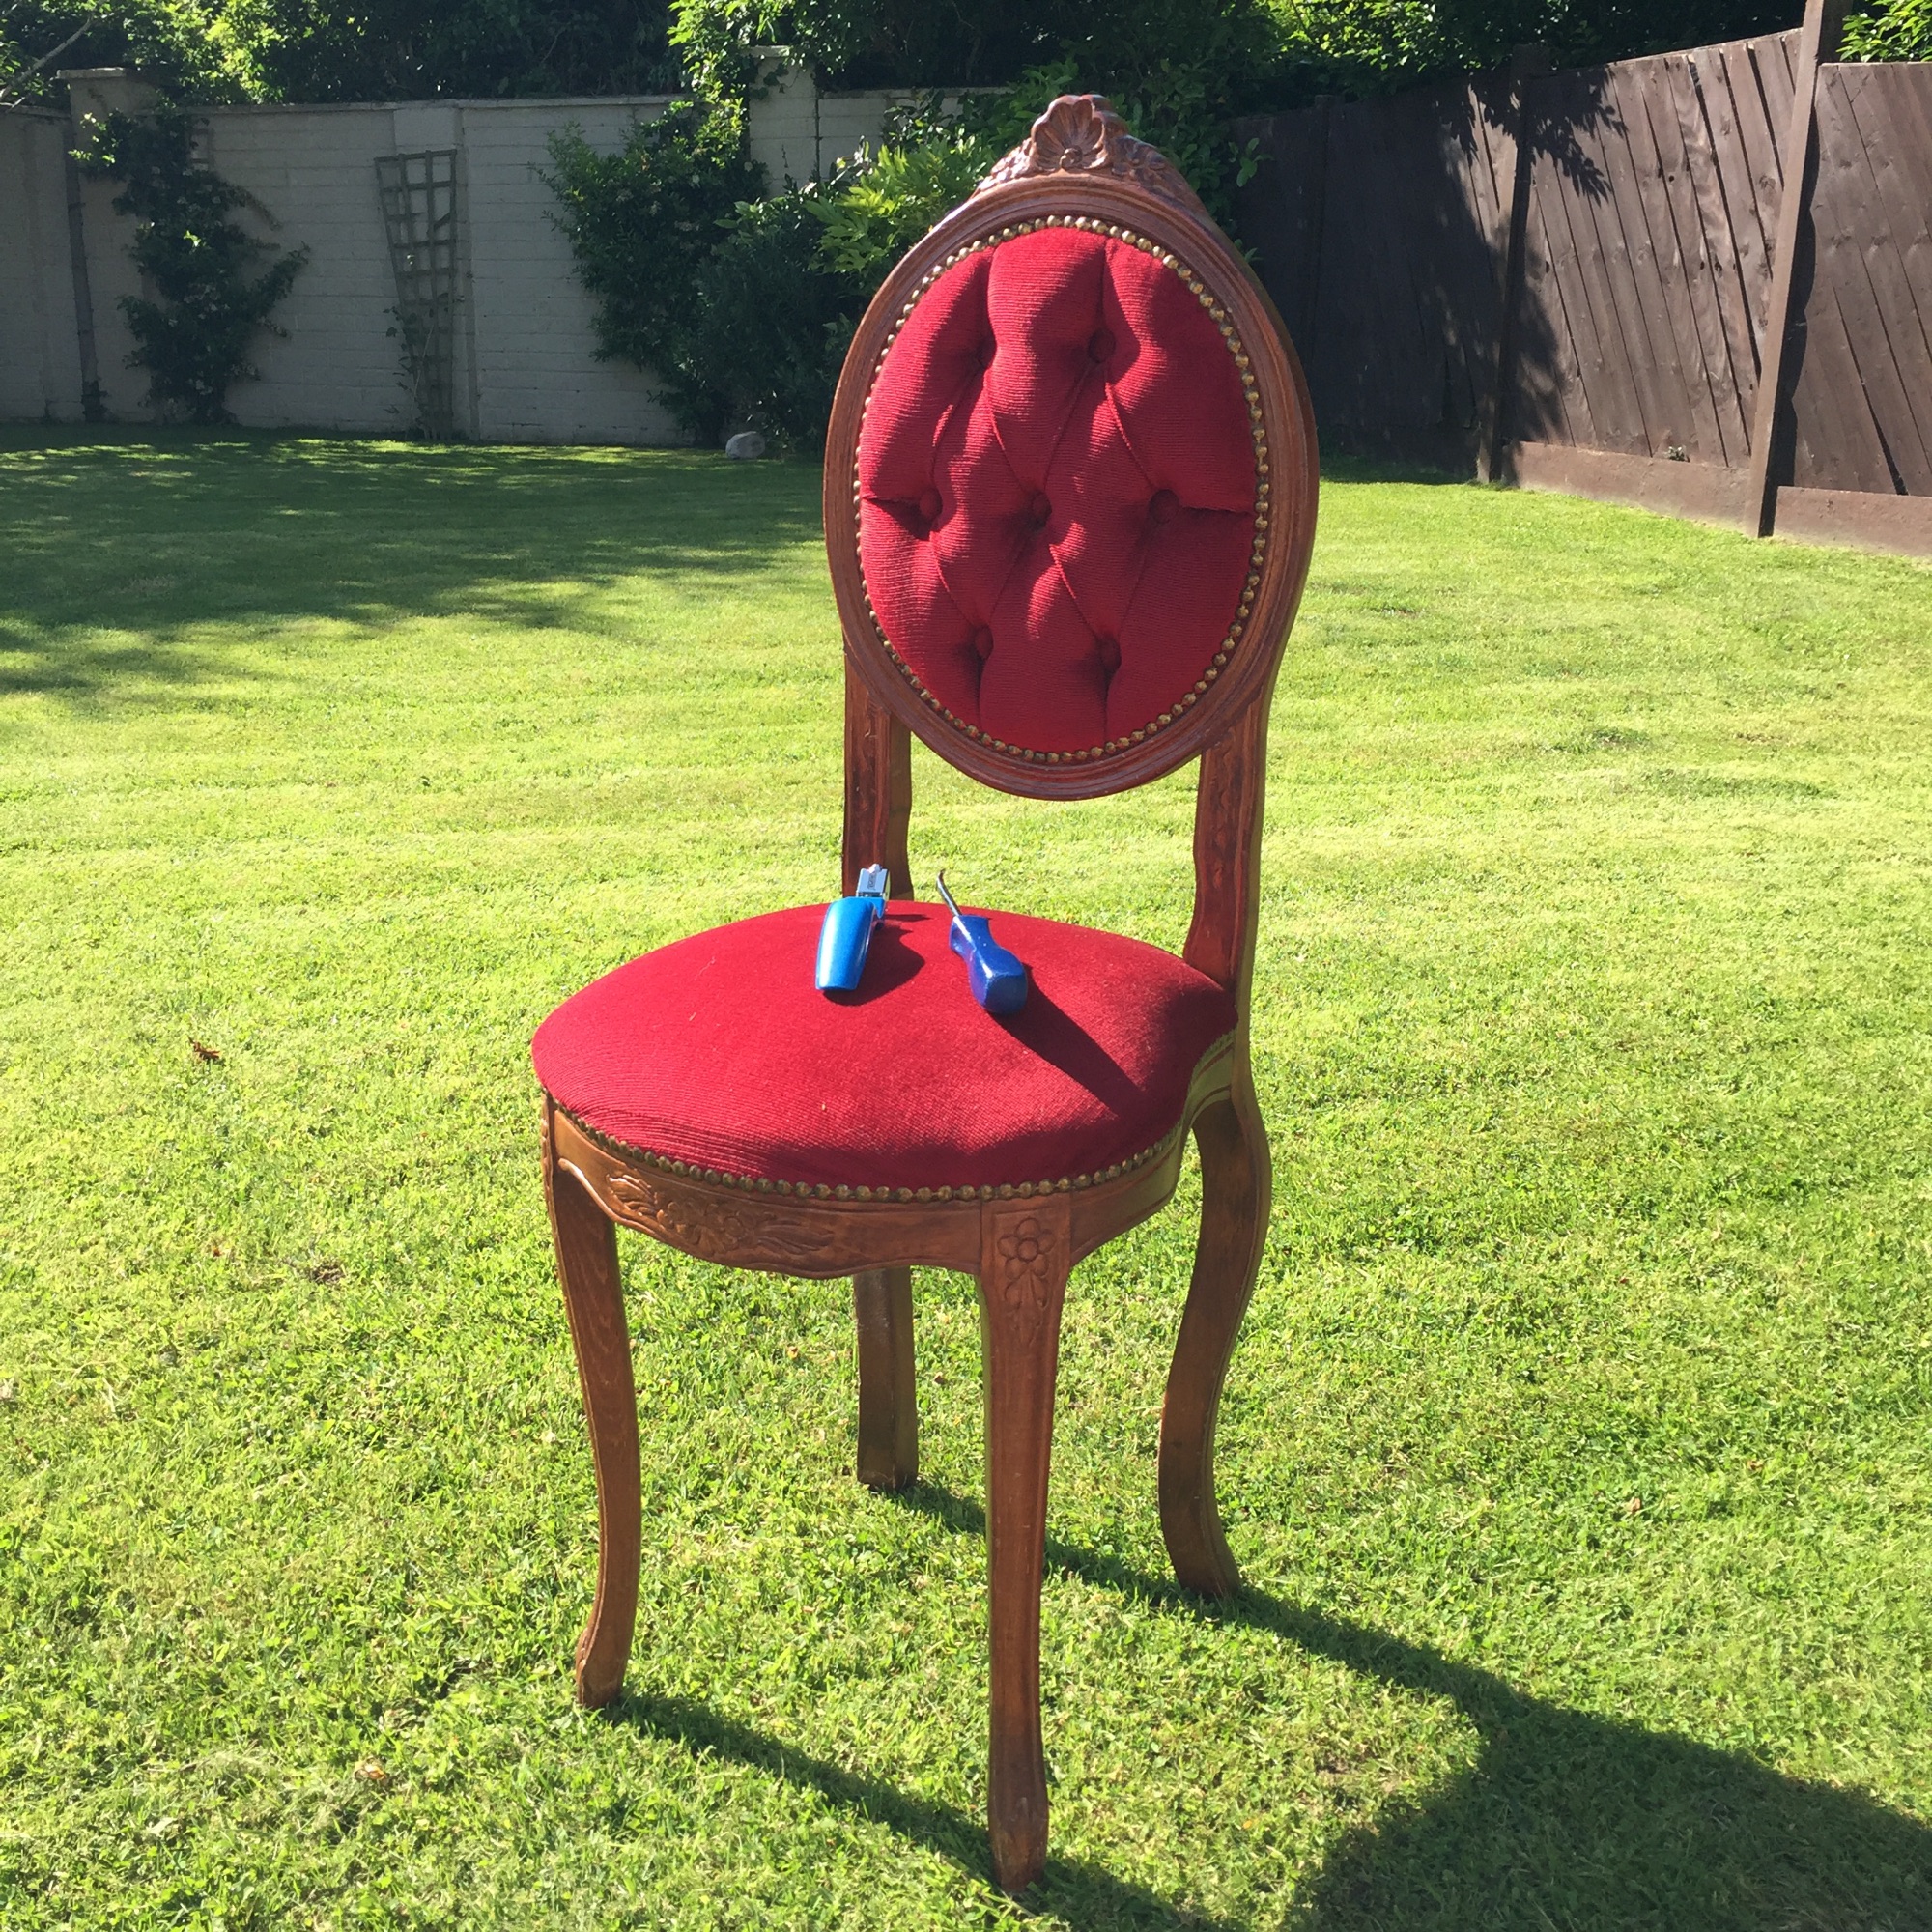
The first job was to remove the studs. This is often easy enough. Modern studs (or tacks) come individually or on strips. This chair is a reproduction and already had strip studs, however, vintage and antique chairs will have individual studs fitted. The best tool for this job is a tack lifter, which helps make light work of their removal.
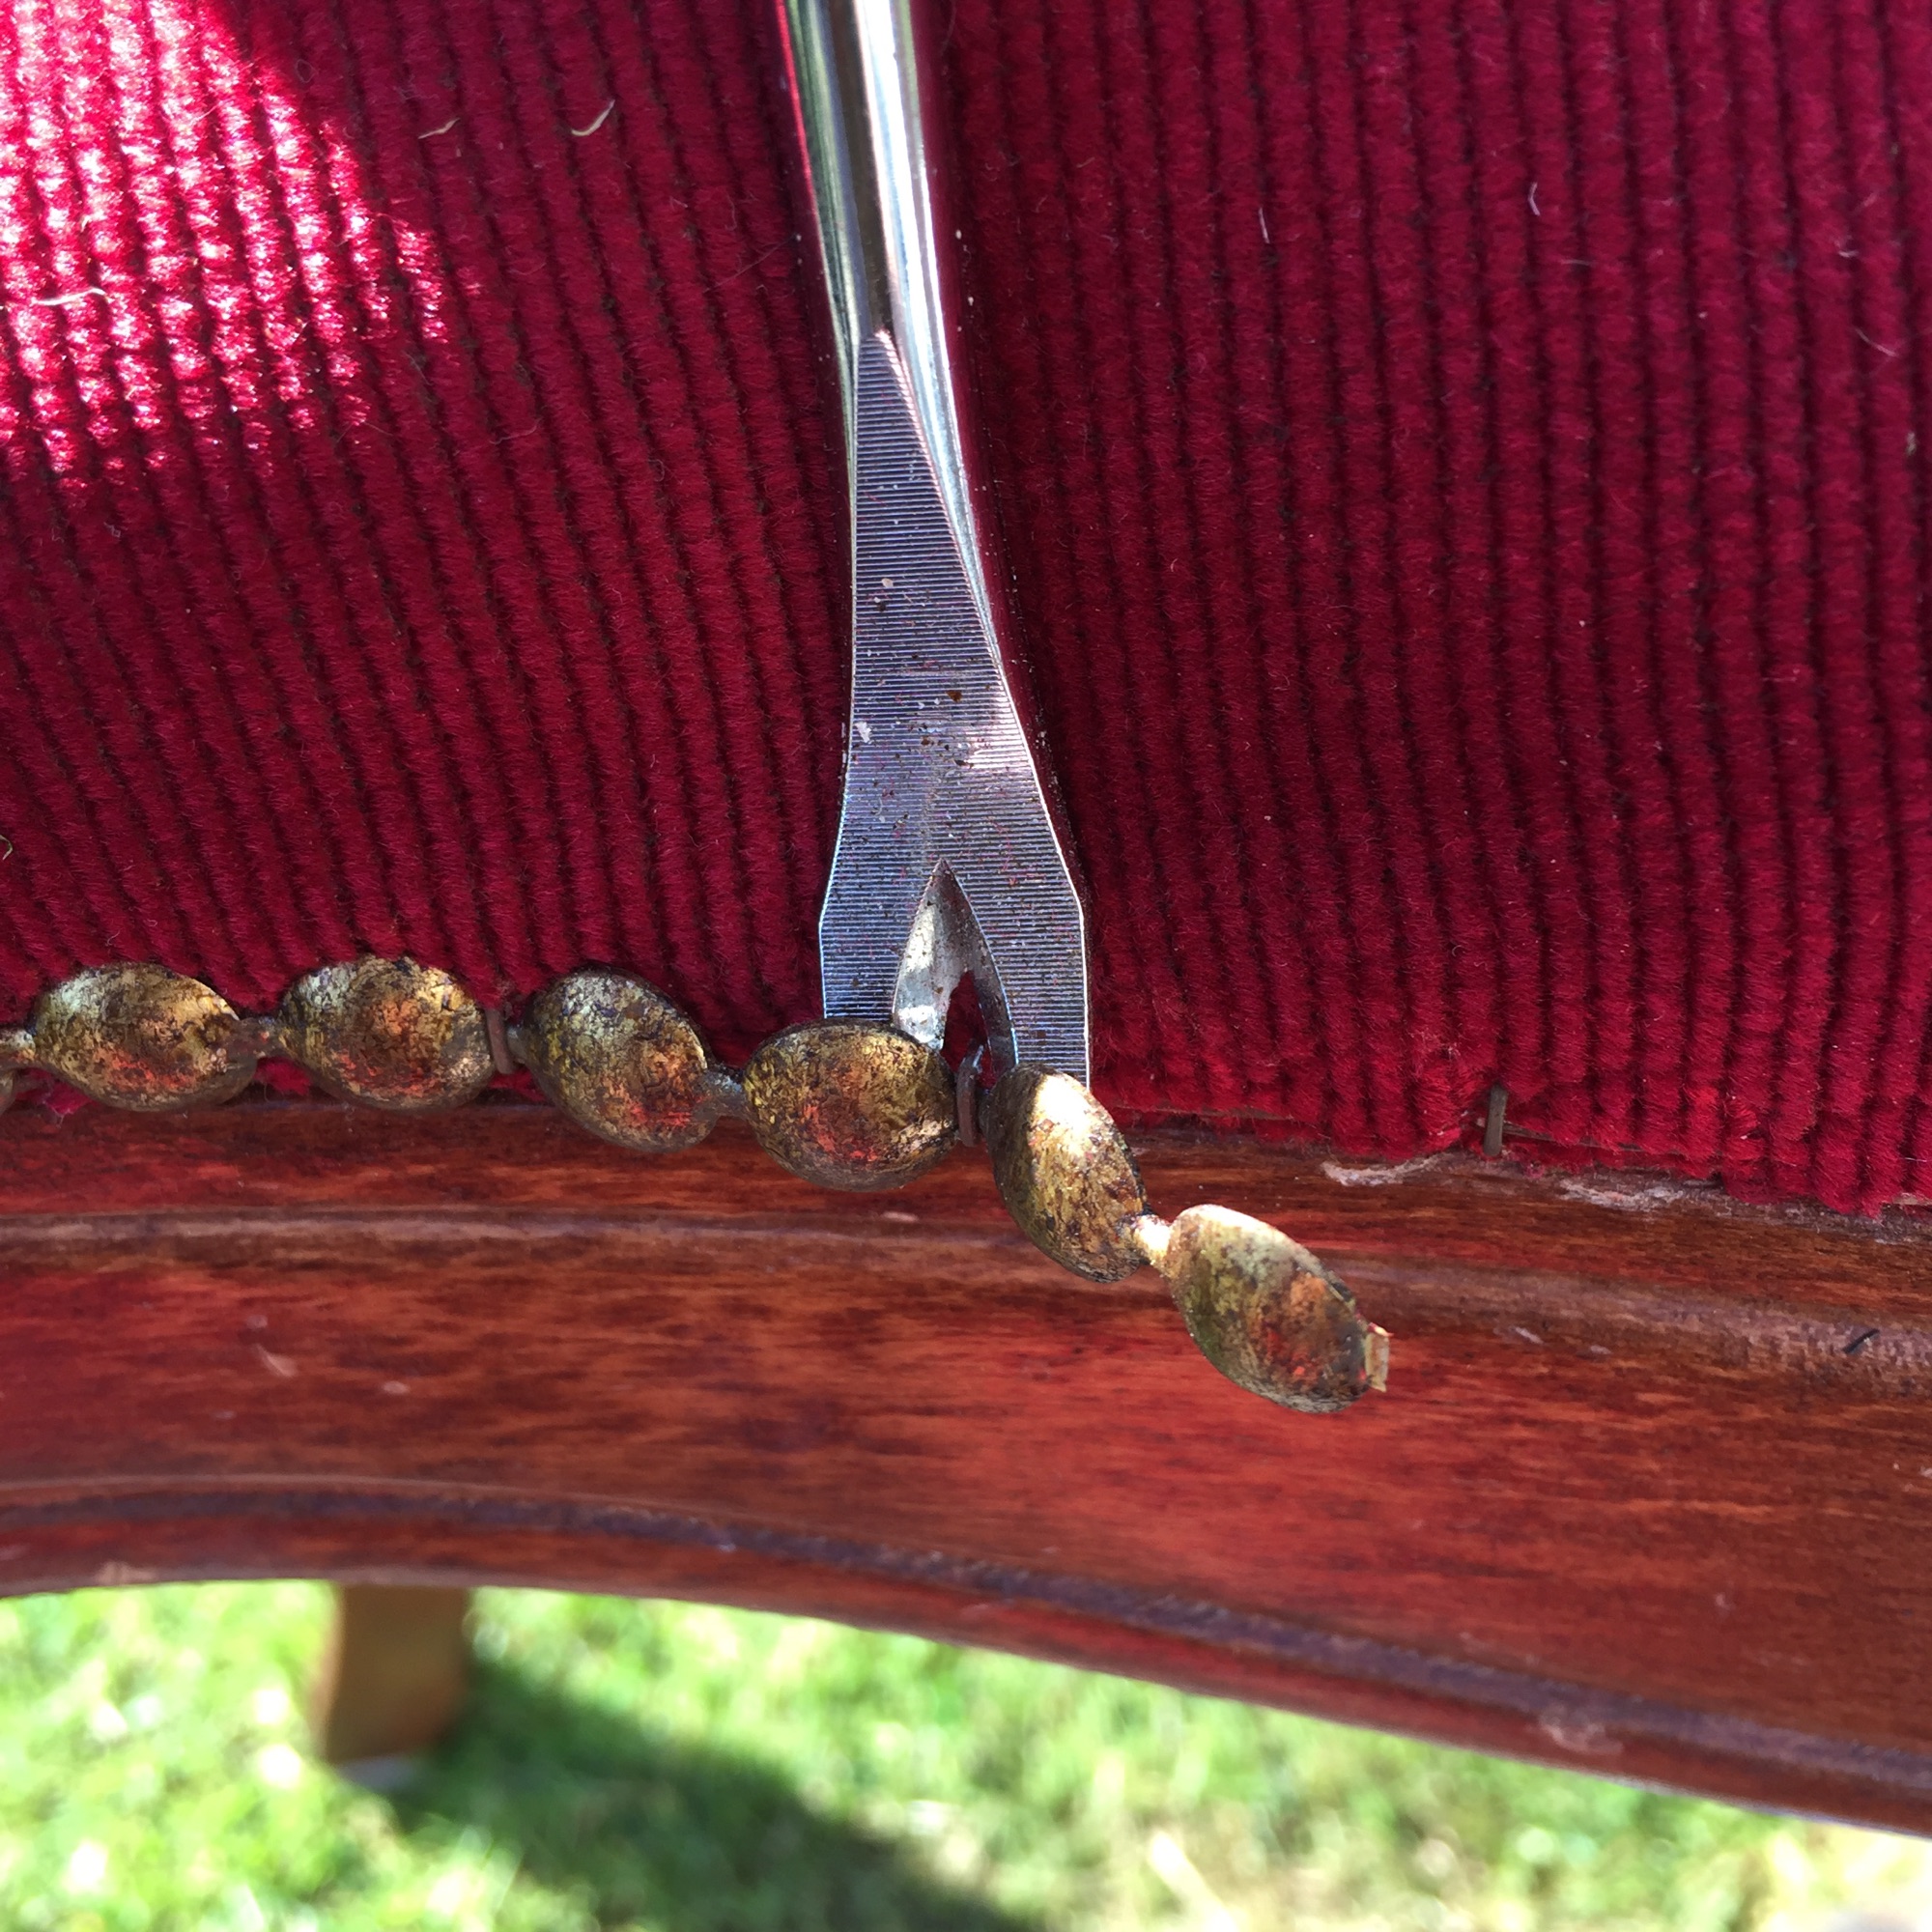
Hiding underneath the old studs you'll see staples holding the original fabric in place. This job is usually not so easy. I did have a staple lifter for this job, but as the staples are so flush to the wooden frame, I needed the help of a thin, flathead screwdriver to get under the staple in the first place. This is not a quick job, so get comfy and be prepared to get stuck in. This is the worst part of the upcycle in my opinion. You may need pliers to remove stubborn staples that have come out on one side, but still firmly routed in the other.
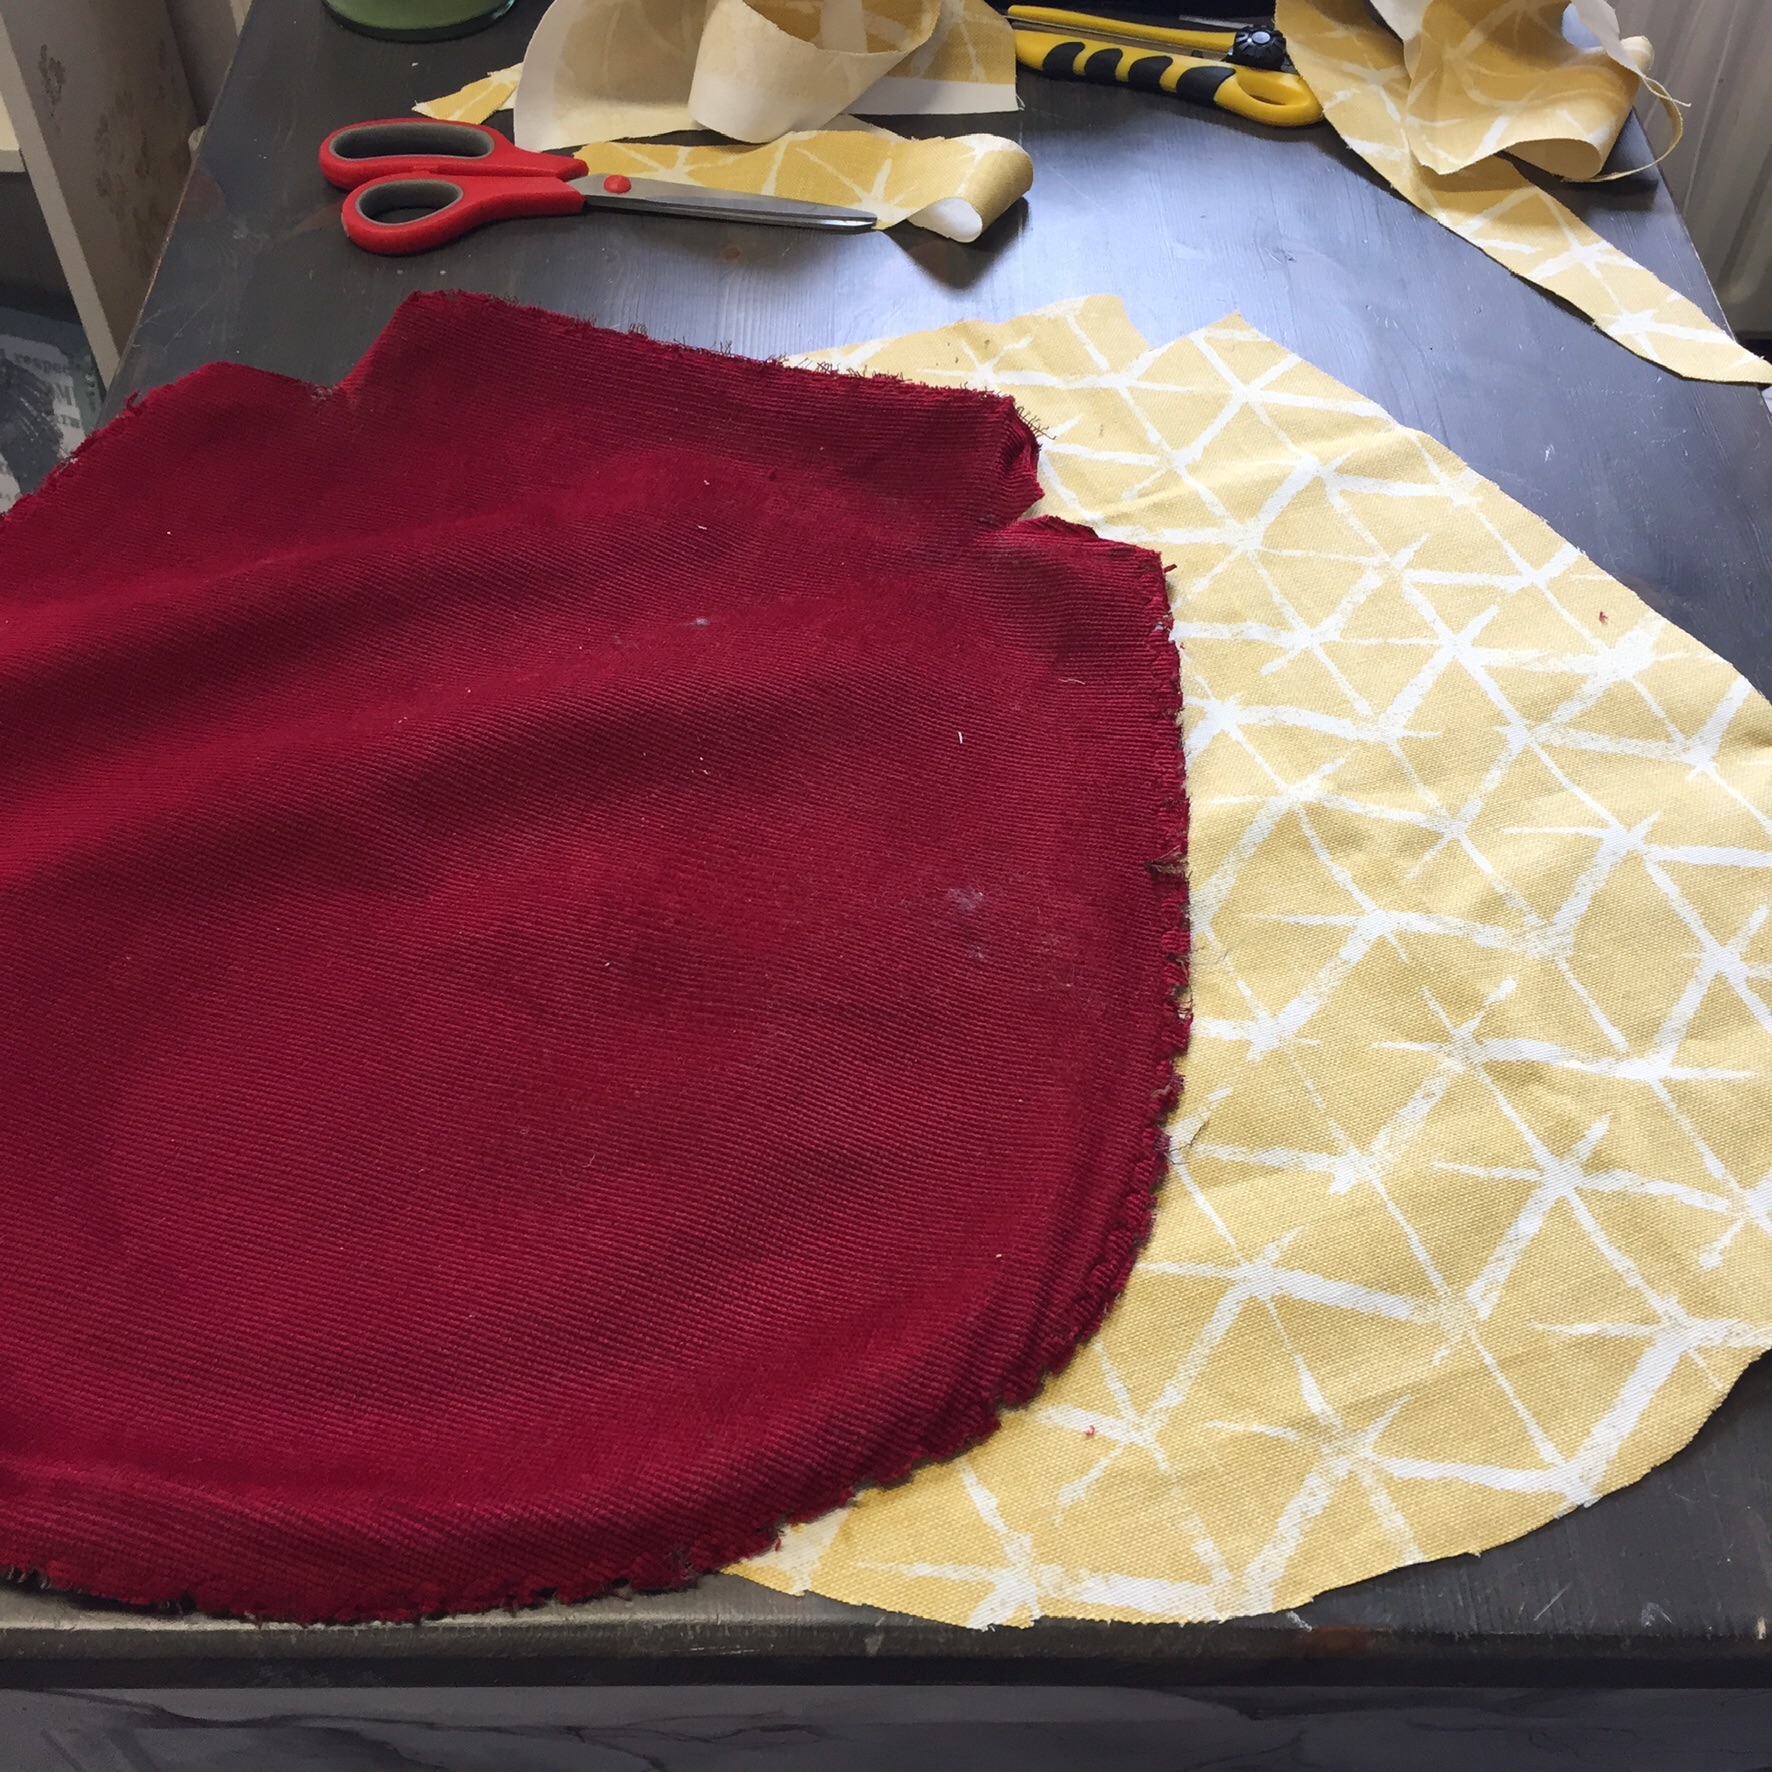
Once all the staples are out and disposed of, you'll have your loose pieces of fabric. Keep these as they are going to be your templates for your new fabric. Mark the old pieces with chalk if need be so you know which part of the chair they are for. Pin the old fabric to the new fabric and cut out your shapes. Take into account your new fabric design at this stage, ie. stripes or a pattern repeat and pin the templates accordingly.
Now you need to remove the old padding/filling if necessary and give your frame a good clean and scuff sand. My client chose Soapstone grey for her frame. This was applied in two thin coats before moving on to the next step. Make sure your paint is thoroughly dry before proceeding (or leave overnight).
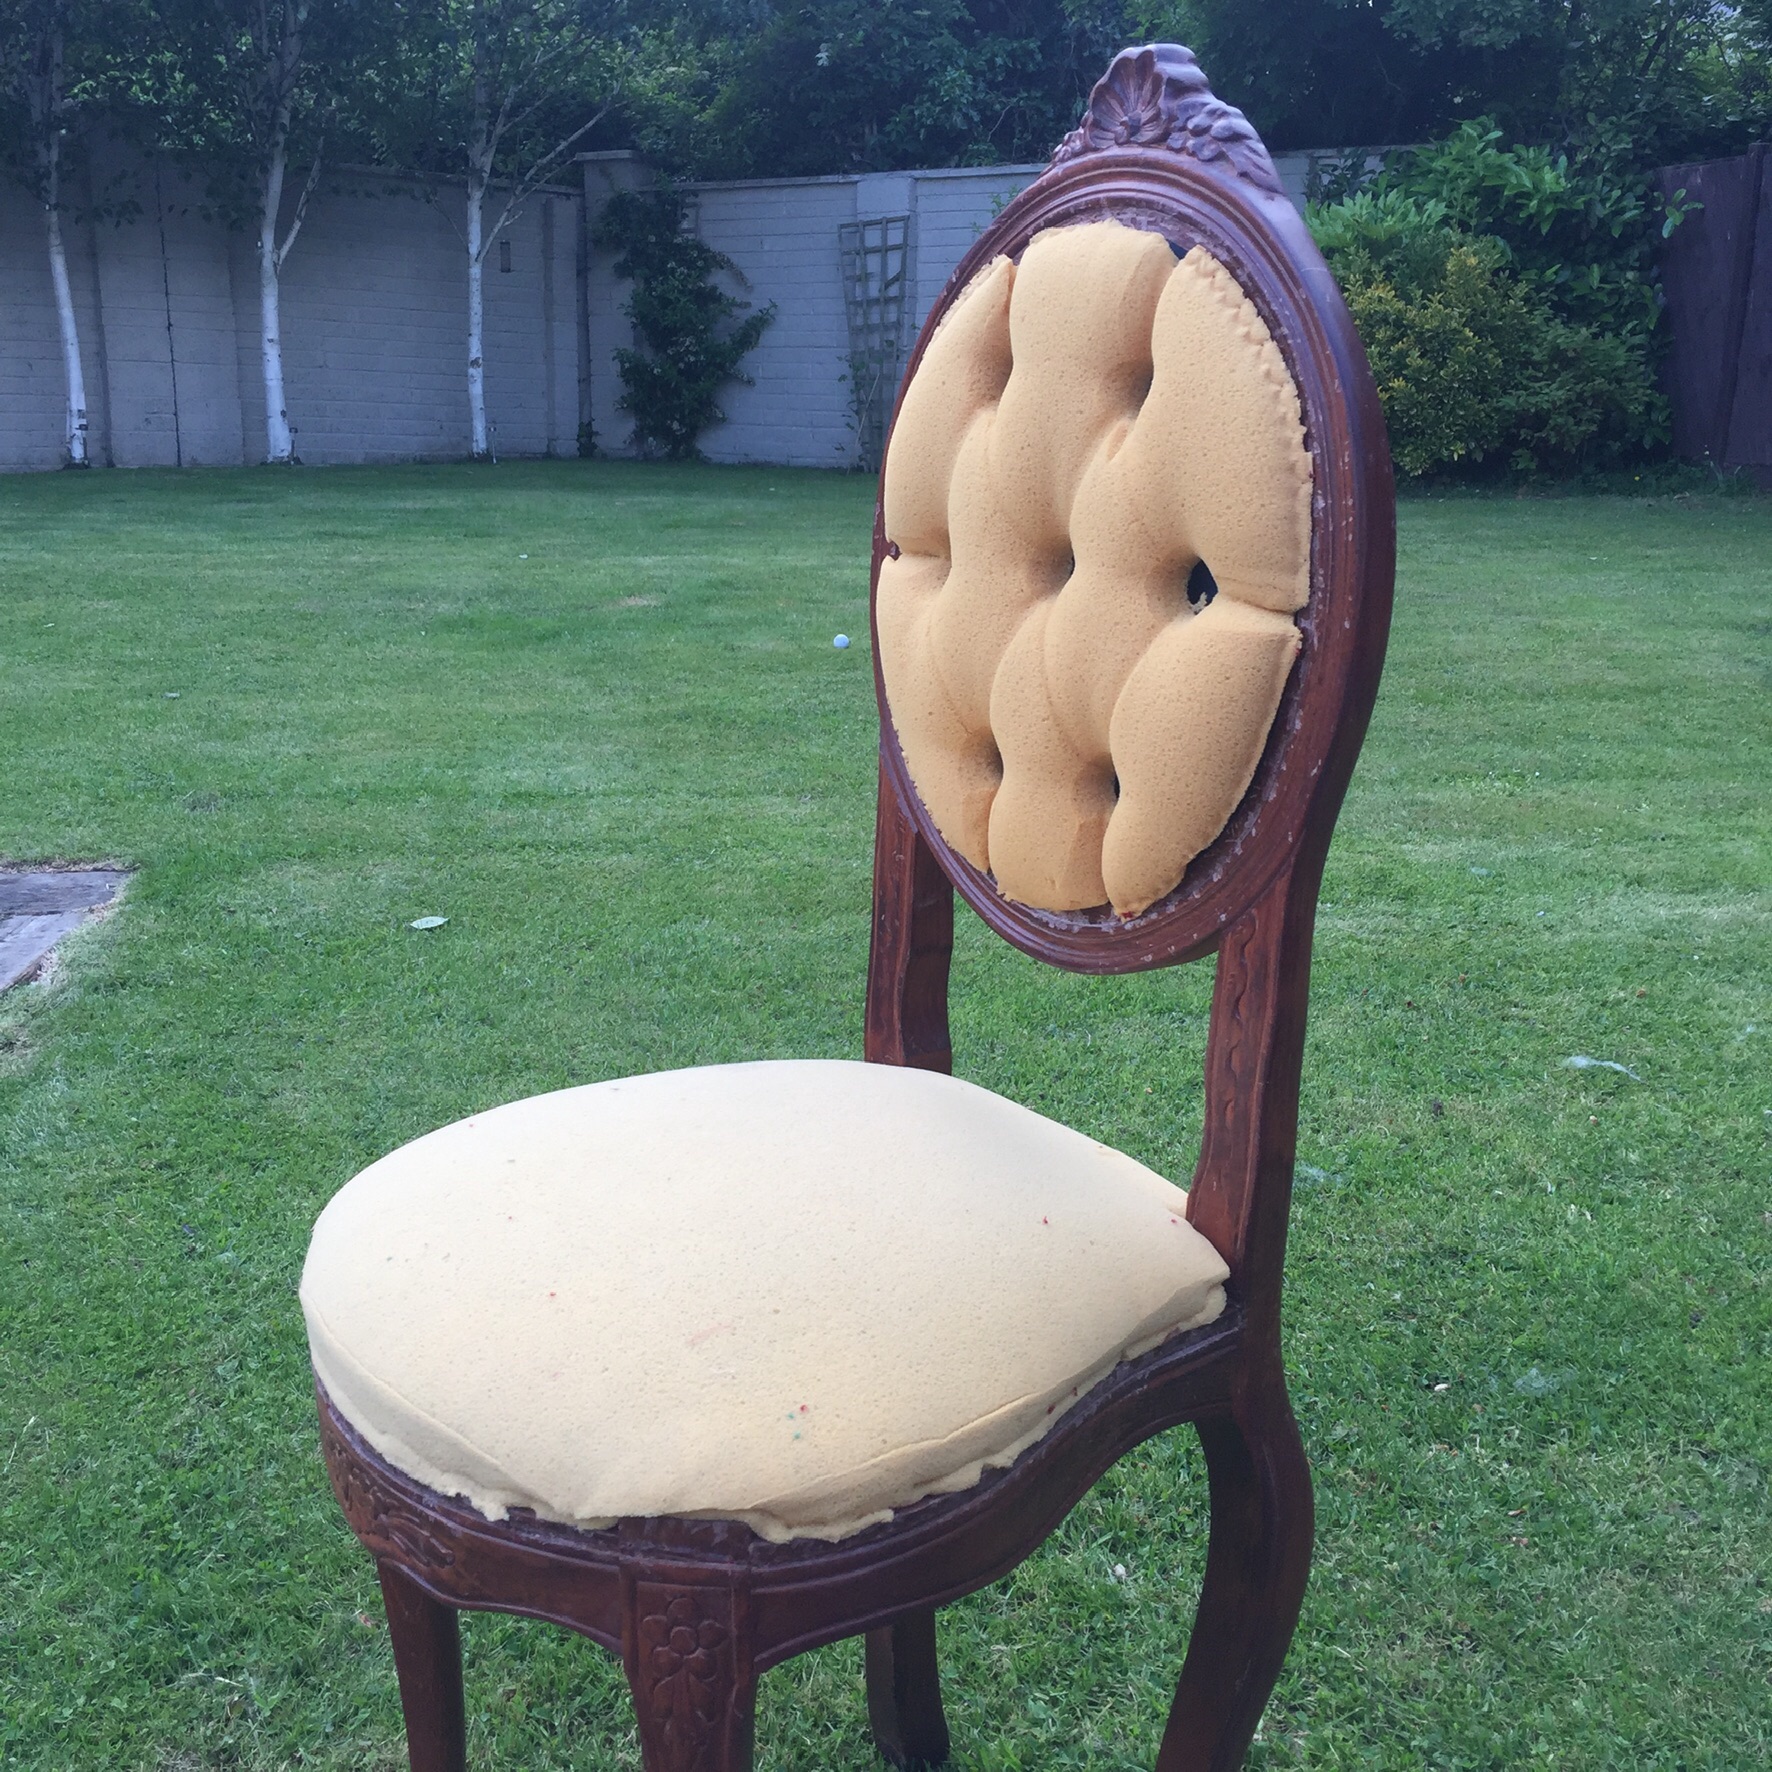

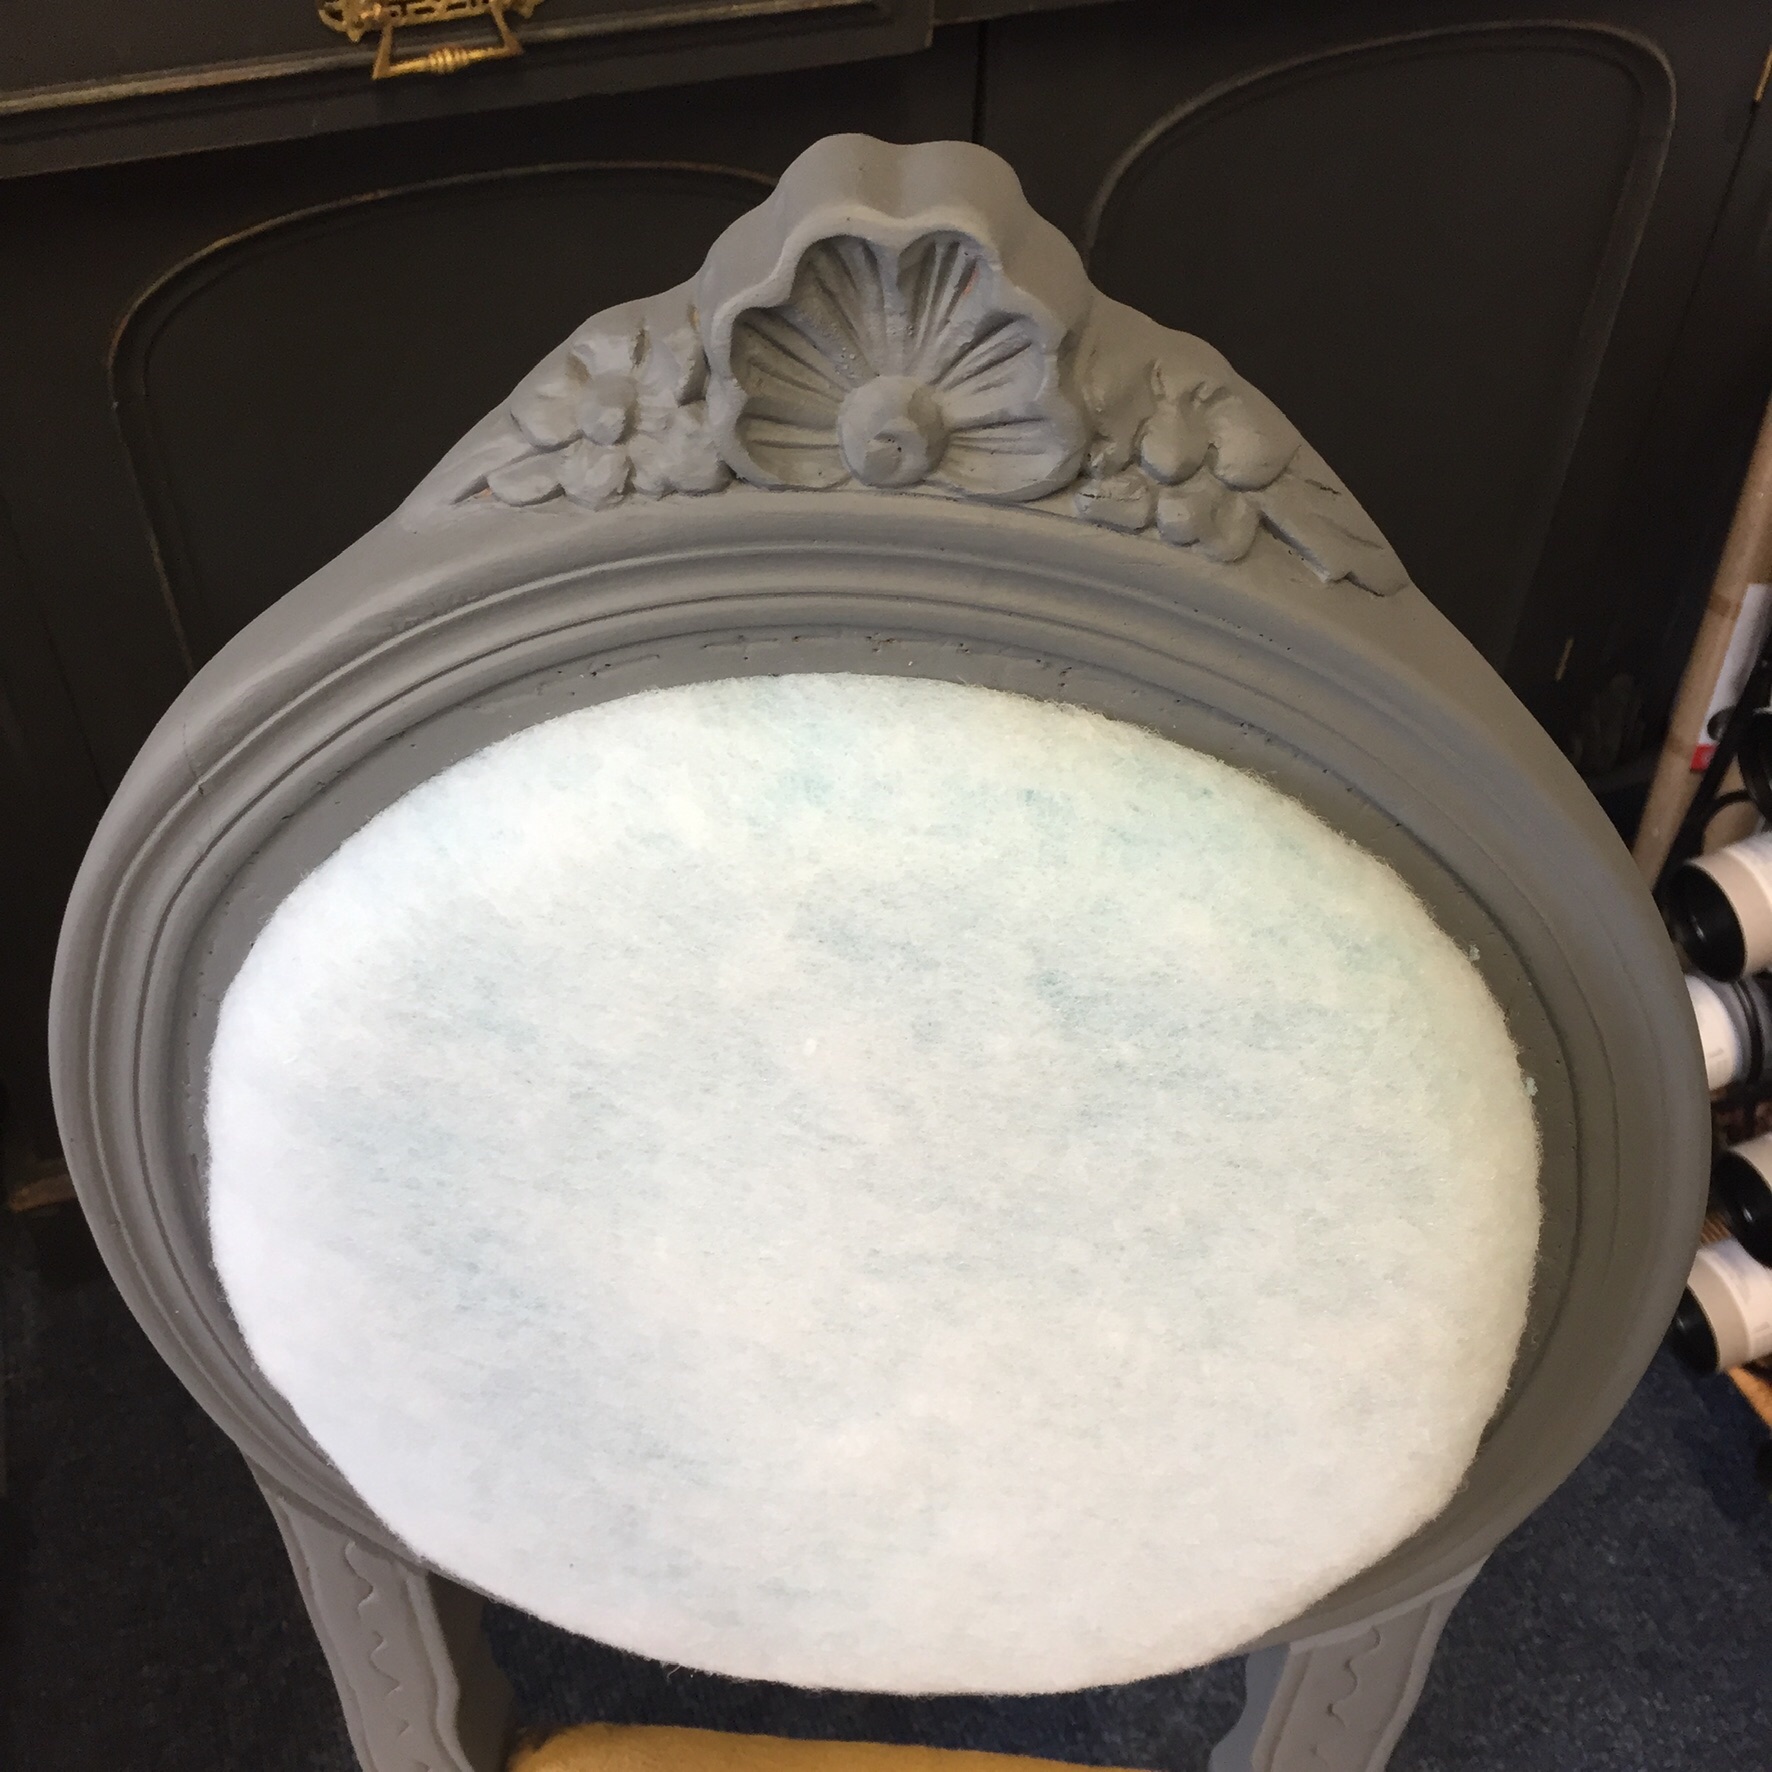
In this instance the seat padding was in good condition and left as is, but the back rest was replaced with new foam and wadding without the button-backed detail this time around (as requested by the client).
Now it's time to start stapling your new fabric to your chair frame. I like to start with the seat pad first, starting at the front and then the rear pulling the fabric firmly so that it's nice and smooth when it's not in use, but don't pull it so tight that you distort the patern of the fabric. An electric stapler is much easier and quicker for this process, but a manual one works just as well. Fold over the fabric for a neat edge as you get to the end of the sides where the frame meets the seat base and the same applies if your chair has arms.
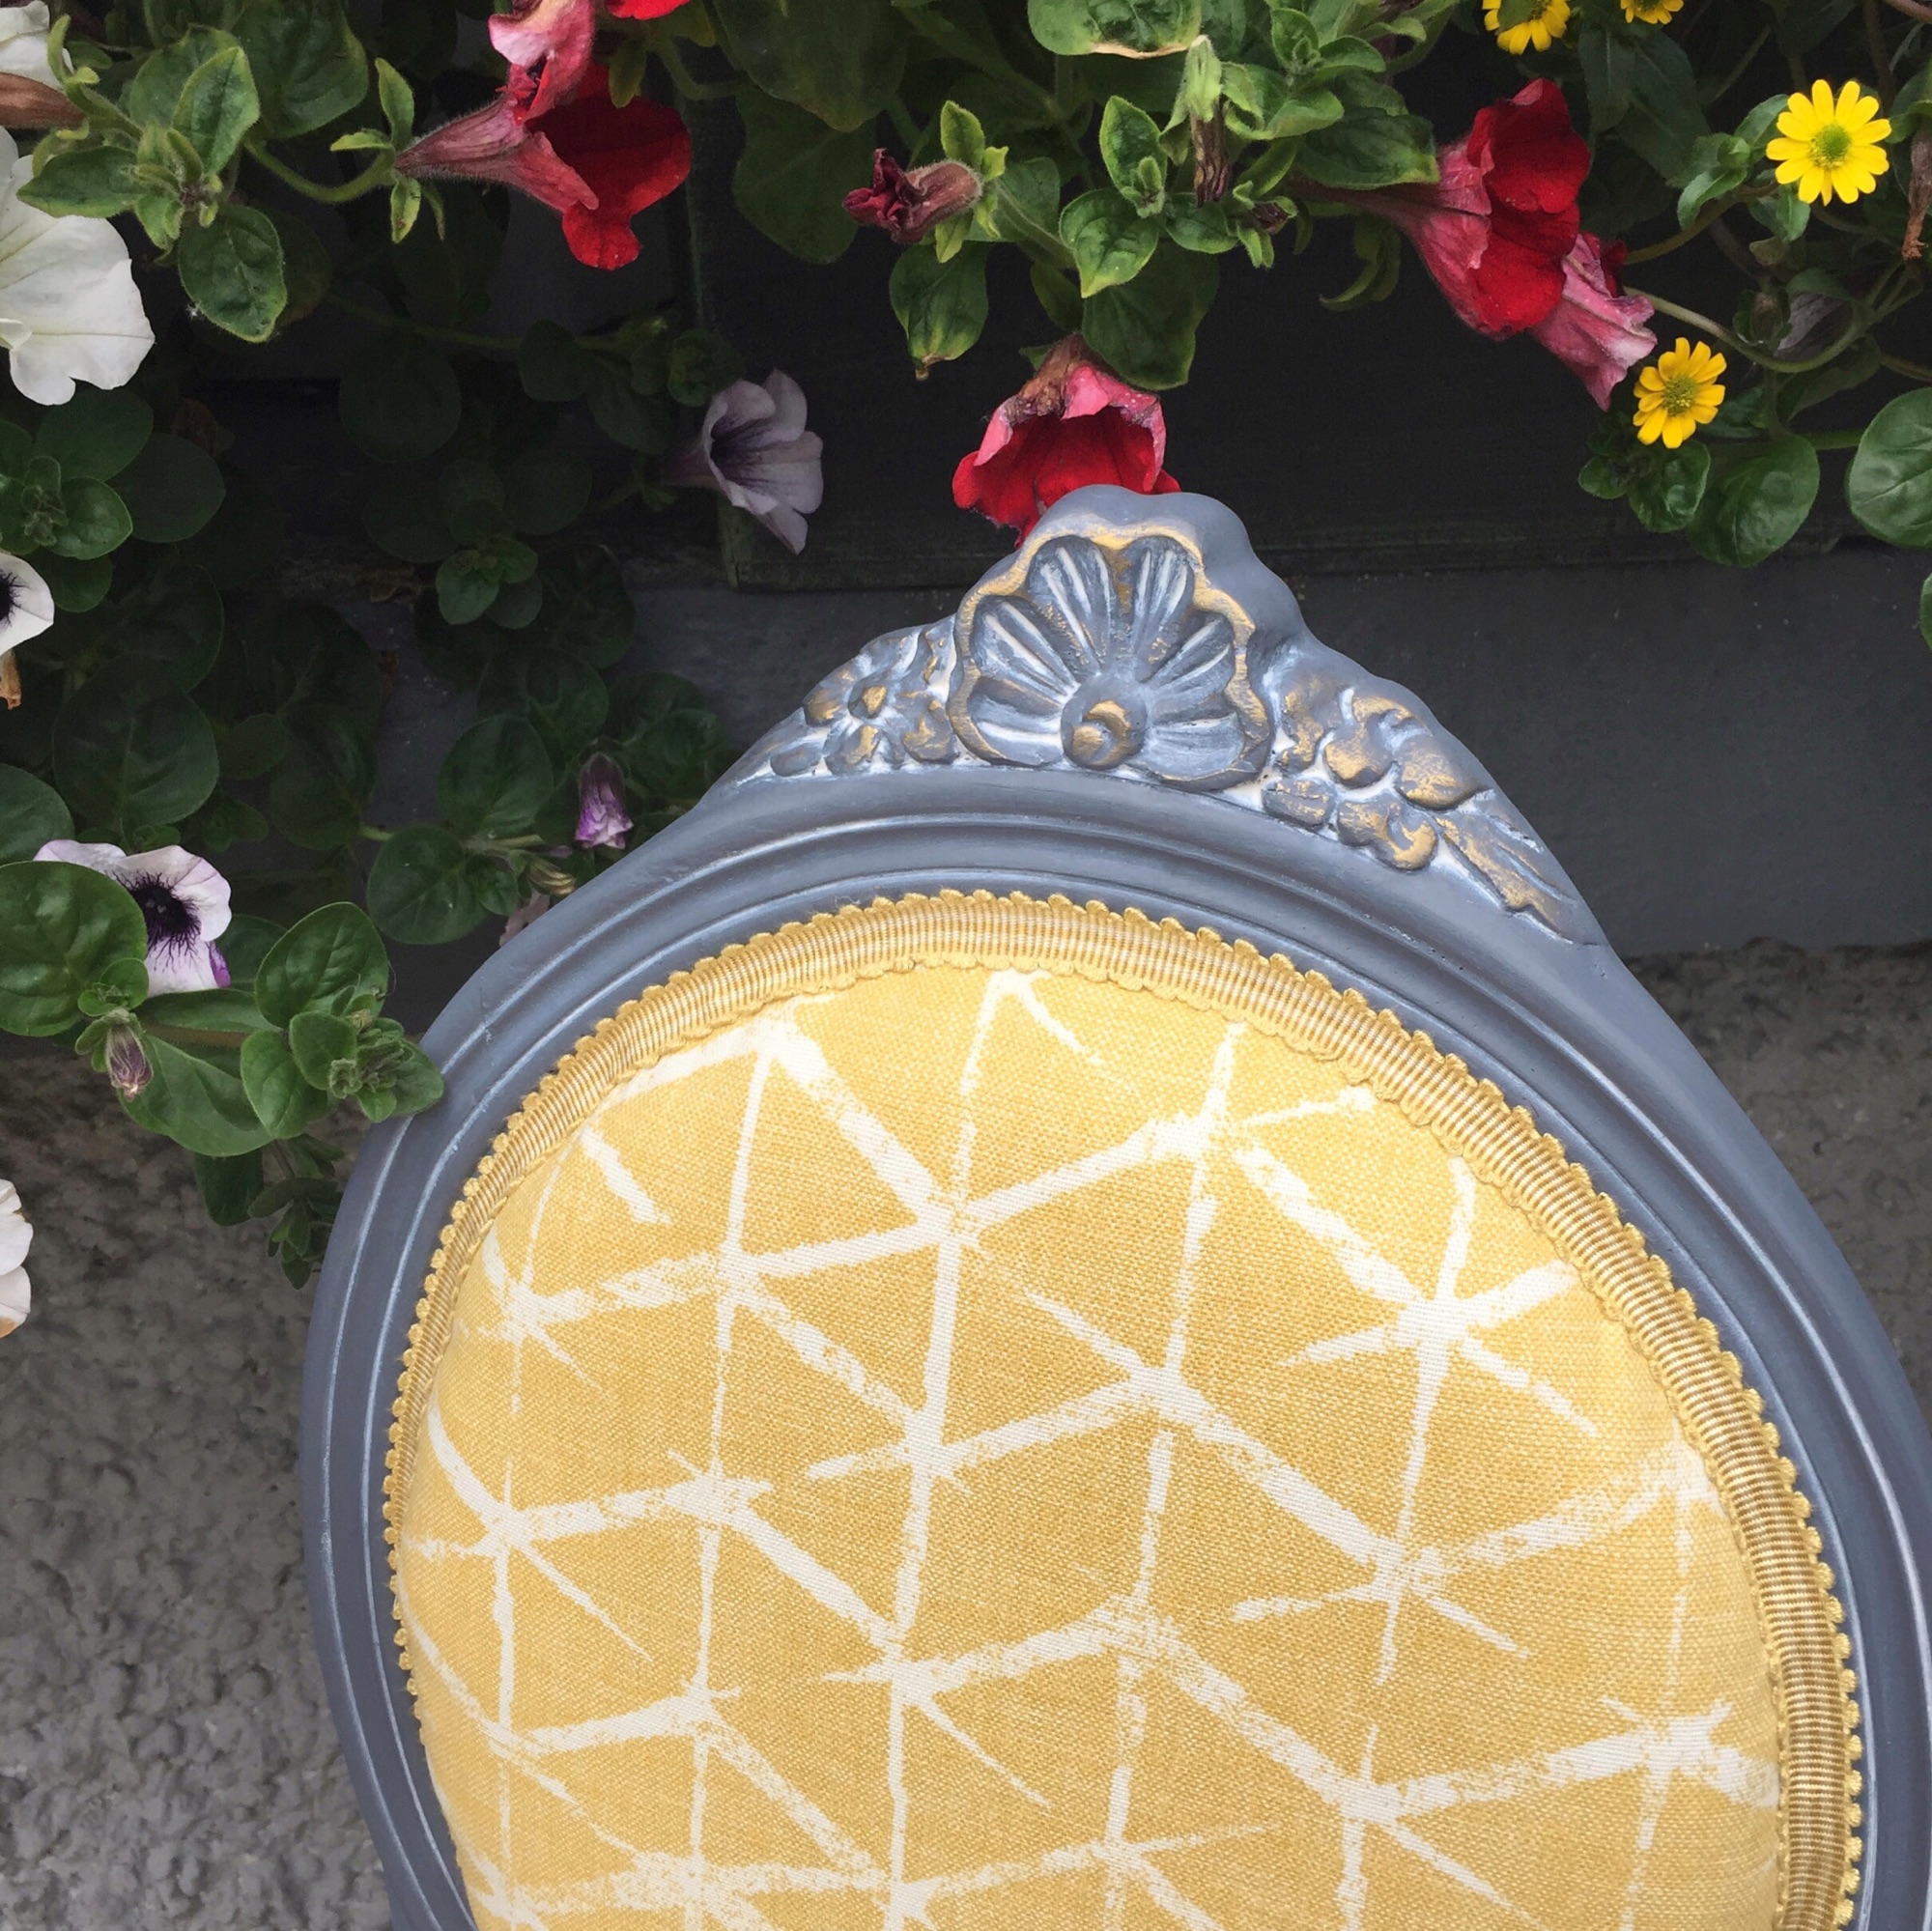
Once all of your sections are stapled into place, trim away any excess fabric if you have some. Now it's time to add your trim to cover the staples. Here you can use a braid or hammer in new studs. On this chair, we opted for a braid which matched the fabric pattern perfectly and it gives it a more modern finish than using studs.
I fixed the braid into place with a hot glue gun. I added the glue directly to the braid itself in small sections and pressed in place before the glue cooled down. Start at a corner or the bottom of the oval backrest by folding a little of the braid over so that you have a neat edge that won't fray. Finish your braid in the same way. Braid (sometimes known as gimp too) is sold by the metre or half metre. Measure the areas where the trim will go with some twine or a fabric tape measure and allow for a little extra where cutting and folding takes place.
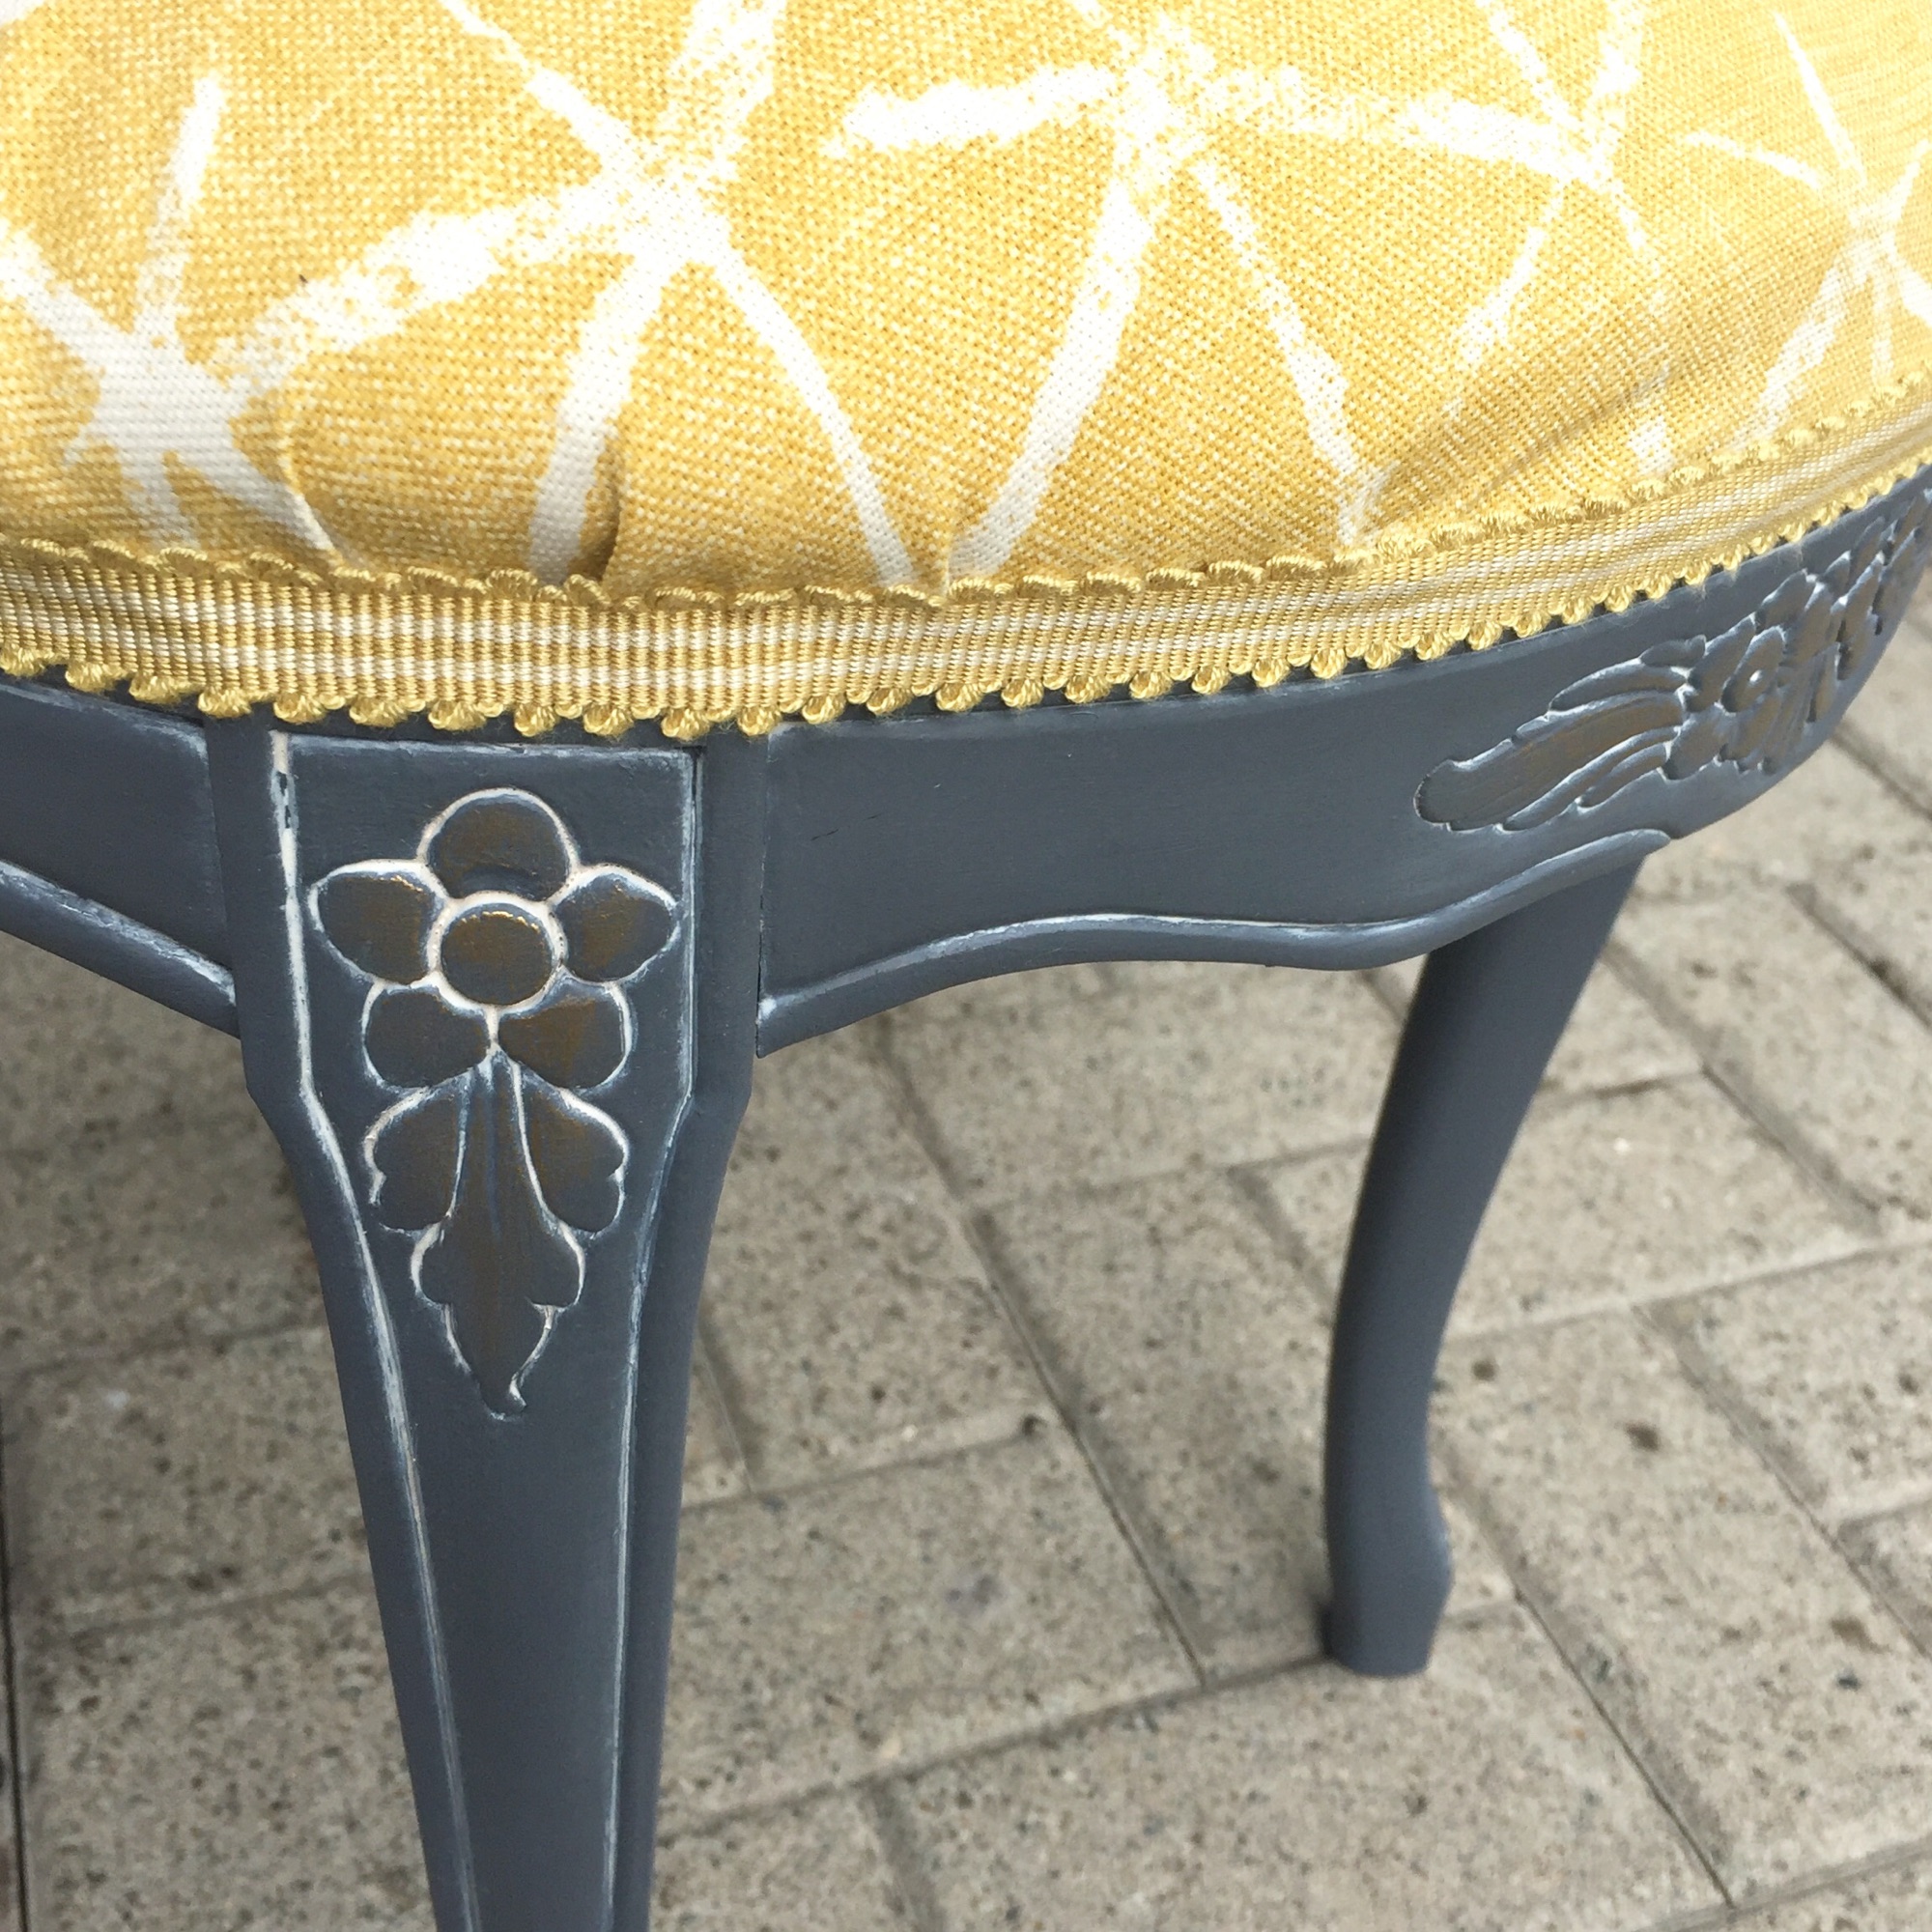
When I had finished the upholstery I decided to add a little glaze into the carvings and ridges to highlight the ornate detail and then a quick touch up with some Vintage Gold metallic wax.
And there you have it. A delightful little occasional chair that has been given a fresh and vibrant modern makeover, bring grey and mustard together that are very on trend right now.
Comments